
Of course we should take one more look at the inspiration...remember it......*swoon* ...
INSPIRATION
 I really fell in love with this mirror when I saw it. But I also knew at that price ($699.00) it would never be mine. The more I looked at it my brain started thinking...hey those quills sort of look like painted bamboo sticks...and so I got started.
 Your supplies should include:
- 149 bamboo sticks (usually 2 packs)
- a round foam disc , 15/16 x 7 7/8
- 10" mirror
- black paint , Paint brush
- glue gun
- felt for backing (not a necessity, just hides the ugly foam)
- leather strip for edging of mirror or ribbon
- twine for hanging
The most expensive part of this project is YOUR LABOR!!! The longest part of the project is the first part, painting your bamboo sticks. I must admit I totally messed up the first pack. I originally spray painted all the sticks a creamy white and was going to paint the stripes over it. BUT I didn't realize the white paint I had was waterproof and therefore the stripes would not adhere.... Oopsy.
Yes YOU WILL be hand-painting the black stripes on. Place them sort of randomly...with the largest amount of black towards the bottom of the stick. You don't want them to match up exactly. I originally only used 100 sticks but today I added 45 more in and I think , 145 should be your minimum amount for this size.
Let them dry a couple hours.
 2. Bamboo placement---Next I start to insert the bamboo into the foam. I suggest you make your hole by inserting the stick where you want it..then remove it and using your glue gun, apply glue to the bottom inch and re-insert to the hole you just made. You need the glue to keep the sticks from falling out. Insert, remove and glue each stick one at a time as you go.
I started first with the back layer, closest to the wall. I inserted those pretty straight like a sunburst. Then there's room for 2 more layers to the front. Those I started to angle forward only slightly. Be random and just use your eye to fill in the space.

3. Mirror- Then Glue the mirror on the front of the foam. I also glued a felt circle on the back to just cover the foam.
4. Hanging- I admit, thinking about hanging this puppy was an afterthought. I used twine around the circumference of the foam, inbetween the sticks. It's pretty rough looking...
5. Edging----Lastly, I used a strip of leather to place around the edges of the mirror. You can use ribbon or anything else you like. I think I would like a thicker piece of leather next time.

That's it!!! Not bad for under $15.00, I say! The finished mirror measures about 30 inches in diameter.
Warning........This project was not injury free. Getting bamboo under your fingernails and a sliver of glass in your hand......hurts like a mother.... But hey we are imitating porcupines after all!!!!!
But I will tell you this mirror should hang in an area that people will not bump into this!!!!

If you are going to try it, send me your links I would love to see it! And post them. If you are not the DIY type but want one, email me : )


 Lots to do...getting ready. Need to get back in that whole groove again. But first some celebrating this weekend!!!!

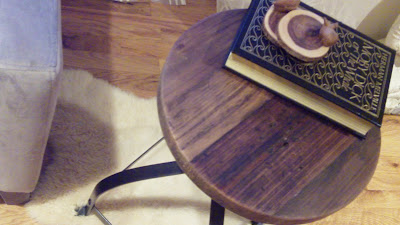
 Oh and how about this great little bar stool that I am currently using as a side table. I adore this metal and reclaimed wood look. It's my favorite recent purchase from Home goods.


